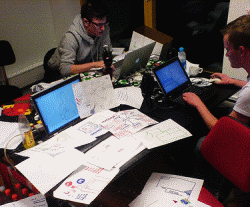
One-sentence summary


One-sentence summary
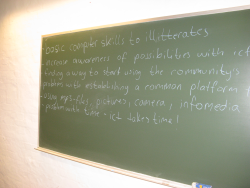
Picture for One-sentence summary

Image by NLanja (Access: 11.04.2011)

Short description

One-sentence sumaries are framed activities that can clearly indicate to teachers the level of there students' understandings. They prompt students to actively angage with the text in order to complete the brief exercise.

Process description

  1. Students summarize knowledge of a topic by constructing a single sentence that answers the questions "Who does what to whom, when, where, how, and why?"

  2. The purpose is to require students to select only the defining features of an idea.

  3. Evaluate the quality of each summary quickly and holistically.

  4. Note whether students have identified the essential concepts of the class topic and their interrelationships.

  5. Share your observations with your students.

PSI: https://psi.methopedia.eu/learning-activity/one-sentence-summary
Partner-Interview


Partnerinterview

/methods/partner-interview/partner-interview.png

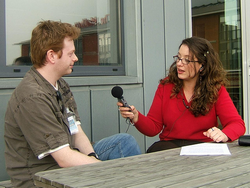
Foto von Lee Jordan (abgerufen am 30.09.2009)

Kurzbeschreibung

Die Teilnehmerinnen und Teilnehmer bilden Paare und befragen sich gegenseitig. Mit den gesammelten Informationen kann ein Partner den anderen in der Gruppe vorstellen und bekannt machen.

Ablauf

  • Paare bilden und darauf achten, dass sich die Paare nicht schon kennen.

  • Befragung und Informationsaustausch in max. fünf Minuten (eventuell Notizen machen).

  • Ein Kreis (stehend oder sitzend) wird gebildet.

  • Die Vorstellungsrunde beginnt, wobei der Interview-Partner Aussagen zur jeweils anderen Person macht.

Benötigte Tools und Materialien

Offline:

  • Papier für Notizen

  • Kugelschreiber

Kommentare

Es müssen nicht alle Aussagen des Interviews wiederholt werden. Mitunter zeigen sich dem Vorgestellten ganz neue Aspekte durch die Interpretation und Auswahl des Partner.

Photo Essay


Photo Essay

Picture for Photo Essay

Image by Thomas Hawk (Access: 01.10.2009)

Short description

A Photo Essay is a collection of photos that tell a story. Very few words, if any, are used to get the message across to the audience. The photo essay may be adapted to include historical information that is important to the content of the pictures. Adding music or special audio effects can enhance any multimedia presentation and set the mood that the author wants to evoke. A photo essay is a project that allows students to use higher order thinking skills.

Process description

Topic related to a unit of study is chosen. Using a central theme, concept or idea, photo essays bring photographs, text, (minimal amounts) and sound together using a multimedia package such as Powerpoint or Windows XP free Windows Movie Maker. Another idea is to have students take their own digital pictures and create a photo essay using original work. Scanned images of student art work may be used as well.

Required resources

Computer, Internet

Podiumsdiskussion


Podiumsdiskussion

Bild zur Methode Podiumsdiskussion

Foto von bensonkua (abgerufen am 15.10.2009)

Kurzbeschreibung

Die Teilnehmer diskutieren eine Problematik von hoher Relevanz.

Ablauf

  1. Ein Teilnehmer leitet die Diskussion.

    • Nennung des Themas

    • Geplante Zeit

    • Vorstellung der Teilnehmer im Podium

    • Erste Frage …

  2. Die Teilnehmer im Podium diskutieren das Thema.

  3. Nach einer gesetzten Frist bittet der Diskussionsleiter um eine letzte Aussage oder eine Zusammenfassung.

  4. Nach der Podiumsdiskussion können die anderen Anwesenden (das Auditorium) in die Diskussion einbezogen werden.

Benötigte Tools und Materialien

Der Diskussionsleiter verschafft sich Informationen zum Thema und bereitet einen Fragenkatalog vor.

Kommentare

Es sollten nicht mehr als sechs Personen an der Diskussion teilnehmen.

PSI: https://psi.methopedia.eu/learning-activity/panel-discussion

Prezentacja wyników


Prezentacja wyników

Prezentacja wyników

Photo by oberazi (strona odwiedzona: 15.12.2009)

Krótki opis

Prezentacja wyników odbywa się w grupie - z wykorzystaniem Powerpointa, strony internetowej, itp. Każdy z uczestników prezentuje wyniki swojej pracy grupie.

Opis procesu

  • tworzymy grupę;

  • ustalamy datę i miejsce spotkania;

  • każda osoba prezentuje wyniki swojej pracy, grupa może zadawać pytania lub przedstawiać swoje sugestie i pomysły.

Wymagane zasoby

  • Miejsce na spotkanie

Komentarze

Jeśli nad tym samym tematem pracowało kilka grup, można przedstawić jeszcze raz wyniki uczestnikom wszystkich grup. Taka prezentacja, po fazie aktywnego uczenia się, zwykle stanowi atrakcyjne podsumowanie pracy.

PSI: https://psi.methopedia.eu/learning-activity/presentation

Projektmethode


Projektmethode

Bild zur Methode Projektmethode

Foto von Kofoed (abgerufen am 05.02.2010)

Kurzbeschreibung

Im Projektunterricht entwickeln Lernende und Lehrende aus einem Problem, einer Idee oder einem gesetzten Ziel einen Bearbeitungsplan, der unter Beachtung selbst gesetzter Regeln durchgeführt wird, und an dessen Ende das fertige Produkt in Form einer Broschüre, einer Internet-Veröffentlichung oder eines Computerprogramms etc. steht.

Ablauf

  1. Die Projektinitiative – Sammlung von Ideen. Ein Projekt kann auf Anregung des Seminarleiters oder der Teilnehmer initiiert werden. Dabei orientiert sich das Projektthema an den Interessen der Beteiligten. So könnte ein Seminarleiter die Ideenfindung für die Projekte moderieren. Die Ideen könnten als Karten an eine Pinnwand gehängt werden.

  2. Auseinandersetzung mit der Projektinitiative. Während die erste Projektphase in der Sammlung der Projektideen bestand, werden diese nun gemeinsam auf deren Realisierbarkeit geprüft und anschließend in einer Projektskizze konkretisiert. Die kurzen Projektbeschreibungen können mit an die Pinnwand zu den Projektideen gehängt und von den Lernenden kurz vorgetragen werden.

  3. Entwicklung des Betätigungsgebietes – der Projektplan als Ergebnis. Nachdem ein Thema gefunden wurde, wird von den Beteiligten gemeinsam ein zielgerichteter Plan zur Bearbeitung des Themas entwickelt, der der Selbstorganisation und Selbstverantwortung der Lernenden obliegt. Der Projektplan als Arbeitsplan zur Bewältigung des Problems wird in der jeweiligen Projektgruppe erarbeitet.

  4. Verstärkte Aktivitäten im Betätigungsgebiet – Ausführung des Projektplanes. Nun werden die geplanten Aktivitäten von den Beteiligten durchgeführt und die Projektpläne bei Bedarf angepasst. Der Seminarleiter übernimmt moderierende Funktionen, berät die Teilnehmer in fachlichen Fragen und geht auf gruppendynamische Prozesse ein, wie z. B. Konflikte, Überforderung oder Zeitdruck.

  5. Abschluss des Projektes. Ist ein Produkt, wie z. B. ein Programm, fertig gestellt, wird somit auch das Projekt beendet. Wichtig für das Feedback ist die öffentliche Präsentation des Produktes, z. B. auf einer Internetseite oder innerhalb der Seminargruppe durch einen Präsentationsvortrag.

  6. Fixpunkte und Metainteraktionen zum Projektgeschehen. Fixpunkte und Metainteraktionen treten bei Bedarf und parallel zu den anderen Phasen in Erscheinung. Fixpunkte dienen der Reorganisation und Orientierung, sind Mittel gegen blinde Betriebsamkeit und fehlende Abstimmung zwischen einzelnen Gruppen.

Benötigte Tools und Materialien

Eine Checkliste: https://downloads.ausbildernetz.de/downloads/m6/checkliste_Projektmethode.doc

Offline:

  • Stifte

  • Papier

Online:

  • PC und Internetzugang

Kommentare

Ein wichtiger Schritt für die Verbesserung des Projektverlaufes und der Zusammenarbeit der Lernenden und Lehrenden ist die Auswertung des Projektes durch Feedback von außen sowie innerhalb der Projektgruppe.

PSI: https://psi.methopedia.eu/learning-activity/project-method

Pytanie i odpowiedź


Pytanie i odpowiedź

Pytanie i odpowiedź

Image by Torley (strona odwiedzona: 01.10.2009)

Krótki opis

Jest to bardziej "towarzyska" odmiana metody pytanie i odpowiedź.

Opis procesu

  • napisz pytania na flipcharcie lub wyświetl je za pomocą projektora;

  • możliwe odpowiedzi na pytania przypnij do tablicy;

  • zapisz numery pytań na flipcharcie;

  • każdy z uczestników chwyta jedną odpowiedź i przypina ją obok pytania.

Wymagane zasoby

  • tablica

  • magnesy

  • pinezki (do przypięcia kartek)

  • kartki z odpowiedziami

  • flipchart

  • projektor

Przykłady

Podaj jakieś przykłady, drobne modyfikacje lub interesujący kontekst.

Komentarze

Aktywność sprawdza się gdy uczestnicy angażują się w dyskusję. Dopasuj liczbę pytań do liczby uczestników, tak aby każdemu przypadła w udziale kartka z odpowiedzią.

PSI: https://psi.methopedia.eu/learning-activity/question-and-answer

Rasender Reporter


Rasender Reporter

Bild zur Methode Rasender Reporter

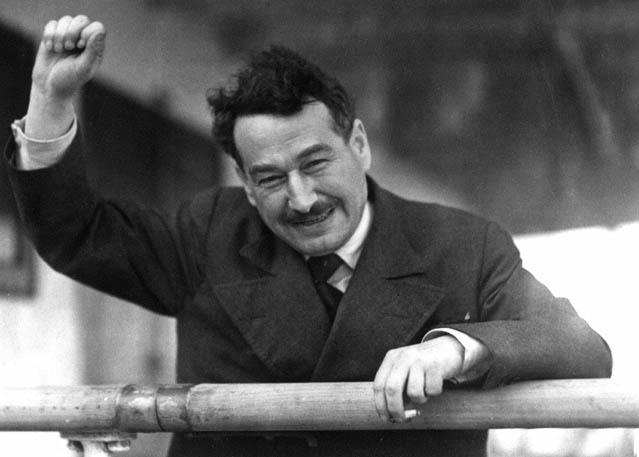
Foto von Egon Erwin Kisch (abgerufen am 12.10.2015)

Kurzbeschreibung

Mit dieser Methode wird die Beantwortung von Fragen im Stile einer Reportage oder Befragung geübt.

Ablauf

  1. Jeder Teilnehmer erhält oder erarbeitet einen Fragebogen zum gestellten Thema.

  2. In der anschliessenden Fragerunde sucht sich jeder einen Interviewpartner und sammelt Antworten zu den Fragen.

  3. Auswertung zu den Interviews und den thematischen Inhalten.

Benötigte Tools und Materialien

Offline:

  • Fragebogen

  • Stifte

Online:

  • Webkonferenzsystem

  • Telefon

Kommentare

Falls es möglich ist, schaffen Sie etwas Platz zum Herumlaufen. Die Befragung könnte auch im Freien durchgeführt werden, wenn es das Wetter erlaubt. Die Auswertung kann im ersten Schritt in kleinen Gruppen erfolgen.

RSS


RSS

Picture for RSS

Image by Tiago Pinhal (Access: 15.12.2009)

Short description

RSS (Really Simple Syndication or Rich Site Summary) is an Internet tool, which allows you to send out summaries of what’s new on a website in the form of headlines and summaries.

Process description

Using this you can send out information from your website and have the recipients see it, even if they haven’t visited your website today. A series of RSS publications from the same source is called an "RSS feed". RSS feeds are commonly seen on websites that update often, like news sites or blogs. To read an RSS feed, you will need an RSS reader of some kind. It can be a standalone program, or a part of an internet browser or email program.

If you use RSS for learning, it is useful to have access to a website that updates on a somewhat frequent basis and with an RSS set up. The students will need an internet connection and an RSS reader to be able to subscribe to your website. When the RSS is set up, the updates on the website can automatically be sent out to the RSS subscribers who will be able to see the updates without needed to keep an eye on your website. This is extremely useful when it comes to sudden updates, like rescheduling of classes or similar urgent administrative messages.

It is also possible to use RSS as a news collector, by setting up a subscription to several different RSS feeds and collecting information from these. This allows both teacher and student to gain an overview of the field covered by the RSS feeds. It is important to choose the relevant RSS feeds that match the course and materials that the students could want to use.

RSS can also be used to make the students into the RSS authors. By having each student create their own RSS feed and have them subscribe to each other, to form a collaborative network where both students and teacher share RSS updates about the subject at hand. This is similar to using social bookmarks, but with RSS, the students are not just finding material to share, but actively creating it. Some blogs have a built in RSS feed generator, which can help with the technical parts of it.

Required resources

You need computers and an internet connection. An internet server with RSS enabled is also helpful to have, or some kind of blog software with RSS built in.

Comments

The image on this page is provided as an illustration only, and is not an actual active RSS feed.

This example is developed in relation to the two EU projects COMBLE (https://www.comble-project.eu/)

PSI: https://psi.methopedia.eu/learning-activity/rss

Rysunkowe zagadki


Rysunkowe zagadki

Rysunkowe zagadki

Photo by Clara J./PIXELIO (strona odwiedzona: 28.09.2009)

Krótki opis

Uczestnicy, w małych grupach rysują razem z trenerem dany temat lub pojęcie. Rysunki prezentowane są wszystkim grupom i komentowane przez wszystkich uczestników.

Opis procesu

  1. Uczestnicy dzieleni są na małe grupy (od 3 do 5 osób). Każda grupa otrzymuje kartkę papieru do rysowania oraz kredki lub flamastry;

  2. Trener określa temat, spontanicznie zdane pytanie lub pojęcie związane z tematem (np. Jak wyglądałoby idealne biuro?);

  3. Członkowie grup rysują obrazek ilustrujący dane zagadnienie. Aktywność powinna zająć ok 15 min (najlepiej jeśli w tle gra przyjemna dla ucha muzyka);

  4. Każda grupa prezentuje swoją pracę pozostałym grupom, które następnie powinny odgadnąć co jest na rysunku i jakie jest jego znaczenie;

  5. Następnie, każda grupa komentuje swoją własną pracę. Trener spisuje słowa kluczowe na kartkach, które są później przypinane do tablicy, obok obrazków;

  6. Kiedy wszystkie grupy zaprezentują swoje prace, spisane słowa kluczowe są gromadzone i analizowane;

  7. Zgromadzone słowa kluczowe mogą stanowić punkt wyjścia dla dalszej pracy nad zagadnieniem (mogą stanowić główne tematy pracy poszczególnych grup).

Wymagane zasoby

  • duża kartka papieru dla każdej grupy

  • ołówki, kredki, flamastry

  • kartki, coś do przyczepiania ich na tablicy

  • muzyka

Przykłady

Podaj jakieś przykłady, drobne modyfikacje lub interesujący kontekst.

PSI: https://psi.methopedia.eu/learning-activity/picture-painting